How many types of navigation in react native
React Native, an output of innumerable repetitions, recalculations, and learnings from the Navigation point of view, though some of them are highly community-built or from the React Native libraries. The flexibility and performance it exhibits on the web and both iOS and Android are commendable and vetted by Top React Native app developers and React Native app development companies. Over the years it has become one of the most preferred navigation libraries in the React Native paradigm.
It is not tough to understand, it is built on the basic concepts of routers which can be composed and nested to help you define the application’s navigation using its default Navigators.
We as one of the Top React Native development companies will today show you the best way to use React Native Navigation libraries and also help you assess the use-case as well. We shall also show you how Navigators function but before we take on our journey, let us first understand the 3 basic built-in navigation used in React Native.
Understanding React Navigation?
It will surprise us if you find React Native functioning and How they really work with a single screen since the transit between multiple screens is what React Components handle and are termed as ’ Navigators” in the terminology section.
What do Navigators primarily do? They are solely responsible for handling the way apps are presented. Indeed, they are important factors that record their performance and history. Remember whenever, you opt for the BACK button, it takes you to the previous page viewed. It might sound weird and no-brainer-stuff but believe me while using the web, you can even change history in the simplest way throughout the app usage.
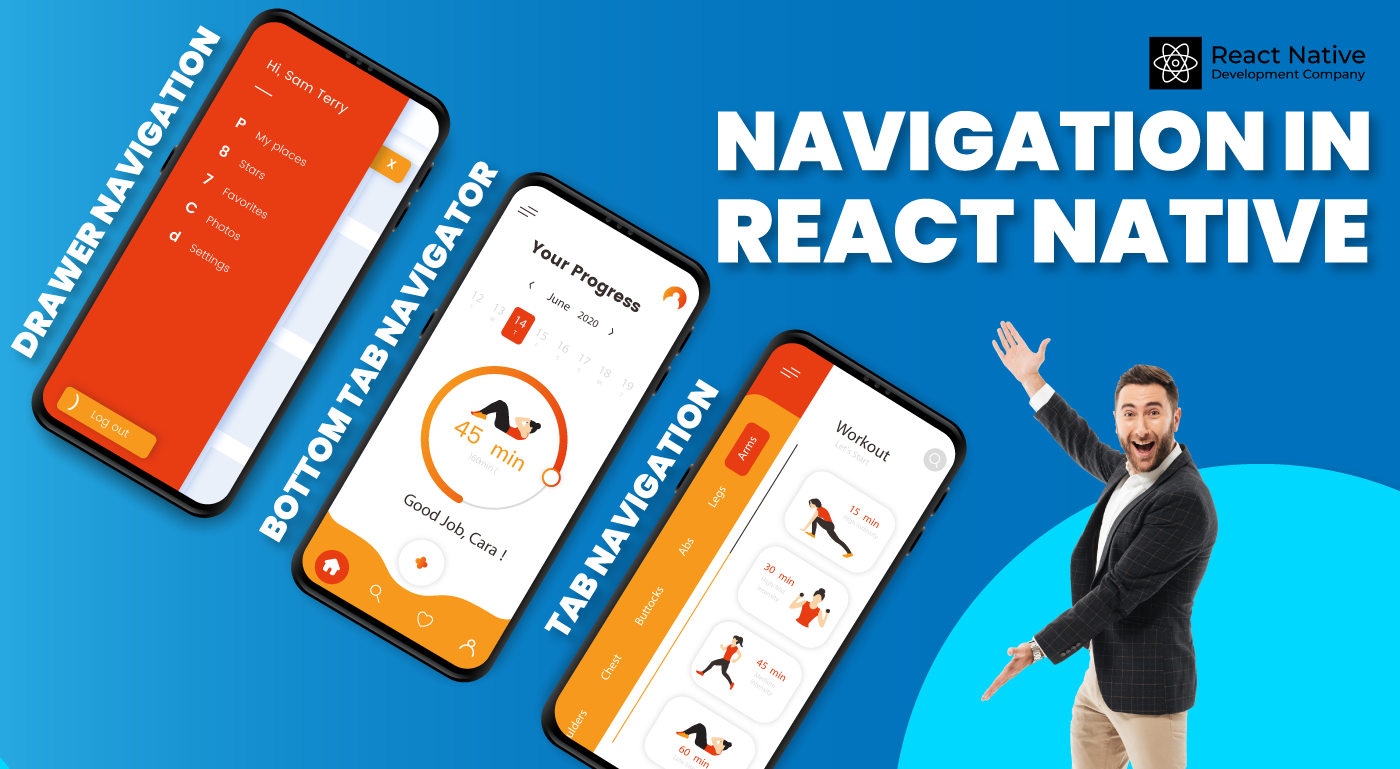
Types of Navigations that are defined in React Native are listed below:
- StackNavigation
- tab navigation
- DrawerNavigation
Stack Navigation
The first one StackNavigator includes or holds screens in stack format [which means when a new screen is viewed, it is positioned on top of the existing one]
TabNavigator
The TabNavigator permits a user to use different screens by simply using the tab that one can use either at the top or bottom of the screen.
DrawerNavigator
DrawerNavigation is the preferred option for Android and is a type of navigation hint that offers users options and points to different screens.
The most incredible thing about all three navigators mentioned above is that React Native app developers and React Native app development companies integrate them effortlessly into the mobile app so you, the user can use it as per your preferences. In layman’s language, the React Native app developer can decide which navigation suits them best and is convenient so he can take charge and use it in accordance. You as a user might have a different choice be it single-screen or multi-screen, however, it largely depends as to how you want the navigator to behave and in which manner to use the use-case.
Before anything else bothers you or makes you confused, let’s explore and understand how navigators together work to help you navigate in your app.
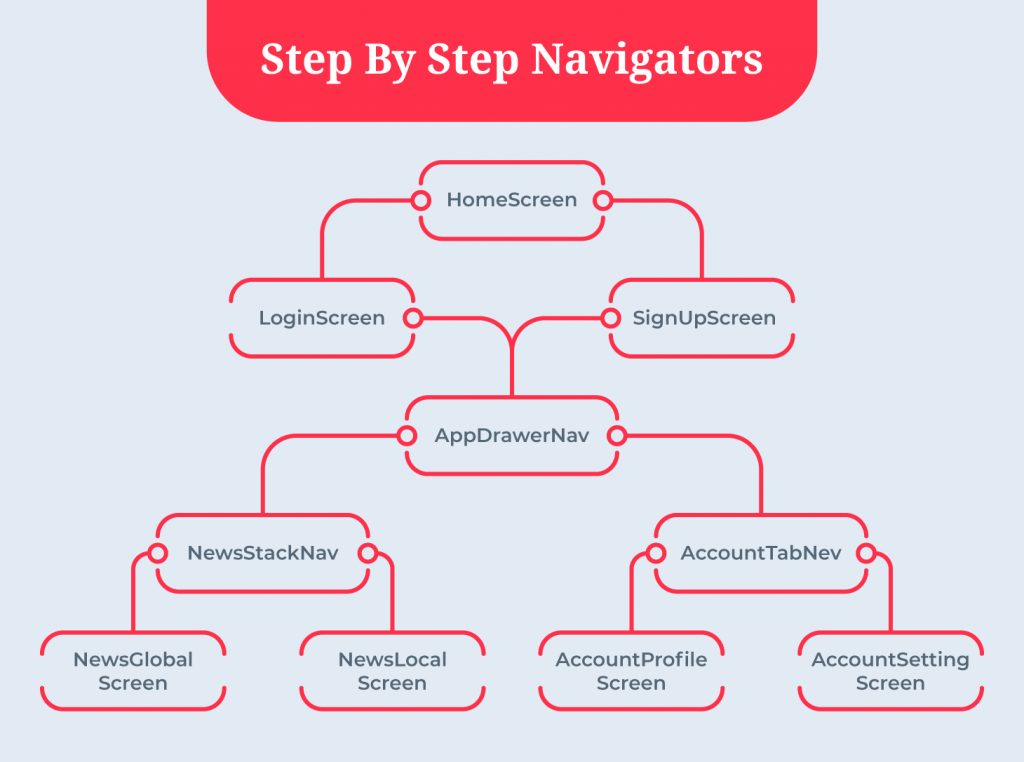
Well, let’s understand step by step How these navigators work?
You must have read them and re-read them that Navigators are React elements commonly named ‘Components’, these components are the icons or images/representations as buttons namely tabs, drawers, and even headers. They hold special responsibility for executing changes made due to navigation requirements within the purview of the React Native app. These components manage and check how you will navigate from your existing view/screen to another – which in simpler terms means handling the transition between the views /screens if there is any.
What is important to note is the existing screen navigated or rendered might turn out to be a solo navigator on its own-this is exactly the right moment to explain the concept of nesting the navigations within its frame, Well if your app shows complexity to operate, the best idea is to make your app navigation simpler and keep it general or take guidance from Top React Native App Development companies.
More complex navigation leads to complexities; hence understanding how React Native work is important.
So What is meant by nested navigation – whilst we are comfortably using Stack, Tab, and Drawer navigators, allow me to take you for a small reading tour of the Navigation Router. Why a Navigation router it has a Stack Navigator for its root navigation and others in nested form.

In addition, let’s start to understand what React Native app development companies work with RootStack Navigation JavaScript and how to react native works:
const AppStackNav = StackNavigator({Home: {screen: Home,navigation options: {header: null}},Login: {screen: Login,navigation options: {header: null}}});
Note: While using nested elements, what is required is the navigation, this has to pass navigation as the properties of these are responsible for every navigation within the application.
Now the generic use of Stack NavNavigation would read as follows:
Navigation.navigate(RouteName, RouteParams);
In our case, it reads:
this.props.navigation.navigate(“Login”);
How does Drawer Navigator look?
This is the generic code for Drawer Navigator- AppDrawerNav.js
const AppDrawerNav = DrawerNavigator({News: {screen: NewsStackNav,navigation options: {title: “News”}},Account: {screen: AccountTabNav,navigation options: {title: “Account”}}});
In case you want to operate it manually, try this:
this.props.navigation.navigate(‘DrawerOpen’);
Also, if you wish to close the drawer manually, try this:
this.props.navigation.navigate(‘DrawerClose’);
Last but not least -Tab Navigator?
The React Native app developer’s code looks like this:
const AccountTabNav = TabNavigator({AccountProfile: { screen: AccountProfile },AccountSetting: {screen: AccountSetting,navigation options: {title: “Setting” }}},{backBehavior: “none”,tab bar position: “bottom”});
Another important Navigation code used by Top React Native app developers looks like this :
import { createSwitchNavigator } from ‘react-navigation’;
import Switch1 from ‘../screen/Switch1’;
import Switch2 from ‘../screen/Switch2’;
export default createSwitchNavigator( { Switch1: Switch1, Switch2: Switch2, }, { initialRouteName: ‘Switch1’, },);
Note: In this case, you can view /see just one screen at a time and while you navigate, it amends the view of the screen immediately without any animation.
Concluding
Readers would not love to close this read without understanding where one can use the three navigators—[Stack, Drawer, and Tab].
What does your user wish to do? if they want to use and switch around a couple of options but in an unrelated segment of apps, they use the Tab Navigation. If your viewers want to use specific segments such as filling in user data etc- use Stack Navigation and If the section of the web requires implementing a menu for your application use, you would probably require the Drawer Navigators.
Frequently Asked Questions
Navigation in React Native refers to the ability to move between different screens or views within a mobile application. It allows users to seamlessly transition from one screen to another, providing a smooth and intuitive user experience. Navigation is essential for creating structured and organized app flows, enabling users to access various functionalities and interact with the app's content. In React Native, navigation is typically implemented using navigation libraries such as react-navigation or react-native-navigation, which offer different types of navigators to handle different navigation patterns and transitions.
The most commonly used library for navigation in React Native is react-navigation. It provides a comprehensive set of navigators and navigation APIs that enable developers to implement different navigation patterns and handle navigation between screens. react-navigation offers navigators such as Stack Navigator, Tab Navigator, Drawer Navigator, and more, allowing developers to create intuitive and interactive navigation experiences in their React Native applications.
1 Stack Navigator: Stack Navigator allows navigation by stacking screens on top of each other. It follows a last-in, first-out (LIFO) approach, where new screens are pushed onto the stack and can be popped off to go back.
2 Tab Navigator: Tab Navigator displays screens as tabs at the bottom or top of the screen, allowing users to switch between different sections or functionalities of the app. Each tab represents a different screen.
3 Drawer Navigator: Drawer Navigator displays a hidden panel or drawer from the side of the screen. It is commonly used for navigation menus or sidebar menus, providing easy access to different screens or sections of the app.
4 Switch Navigator: Switch Navigator is useful when you want to switch between different stacks of screens. It allows you to conditionally render one stack of screens at a time, based on specific conditions or authentication states.
These navigators can be combined and nested within each other to create complex navigation structures, allowing developers to design intuitive user flows and provide seamless navigation experiences in their React Native applications.
1 Identify the button component that triggers the navigation action.
2 Attach an onPress event handler to the button component.
3 Inside the onPress event handler, access the navigation object provided by the navigation prop.
4 Use navigation functions like navigate or push to navigate to the desired screen.
5 Pass any necessary parameters or route information along with the navigation action, if required.
By implementing these steps, you can ensure that when the button is pressed, the specified navigation action is triggered, allowing users to navigate to the desired screen within the React Native application.
1 Identify the screen component for which you want to change the title.
2 Inside the component, define a static property called navigationOptions.
3 Set the title property of the navigationOptions object to the desired title text.
4 Save the changes, and the new title will be reflected in the header/navigation bar for that screen.
By modifying the navigationOptions object and setting the title property, you can easily update the title of a screen without the need for additional coding or complex configuration. This allows you to provide meaningful and descriptive titles for each screen in your React Navigation-based application.
In React Navigation, navigation options provide a way to customize various aspects of the navigation experience in your React Native app.
1 Screen Titles: You can change the title displayed in the header for each screen. This allows you to provide meaningful and descriptive titles for different sections or functionalities of your app.
2 Header Visibility: Navigation options enable you to hide or show the header/navigation bar for specific screens. This is useful when you want to have full-screen views or implement custom headers for certain screens.
3 Header Style: With navigation options, you can customize the styling of the header/navigation bar. This includes changing the background color, adding a background image, modifying the text color, and adjusting the header height.
4 Header Buttons: You have the ability to add custom buttons to the header/navigation bar using navigation options. This enables you to include actions or additional functionality specific to a particular screen.
5 Screen Transitions: Navigation options allow you to define custom screen transitions, such as slide, fade, or flip, to enhance the visual experience while navigating between screens.
By leveraging the power of navigation options in React Navigation, you can tailor the look and feel of your app's navigation, providing a cohesive and engaging user experience throughout your React Native application.
